


A Step by Step Guide to Shooting the Night Sky
Paul Reiffer – Shooting the Night Sky
Night/Astro/Star/Star-trail Photography – whatever you want to call it, this is a genre which has become increasingly popular over the past couple of years (partly connected with the increase in sensitivity of reasonably-priced camera sensors over the same period). The irony being, it’s also one of the easiest forms of photography that yields some of the most impressive results if you get it right.
Given the chance for some downtime while travelling around the New Zealand wilderness in our “Jucy Casa” campervan, I reflected on the sheer volume of exactly the same questions which were asked by the people around us while shooting at Lake Tekapo. So, with that in mind, here’s “Paul’s Guide to Star Photography” – hopefully in bite-sized chunks that are easier to digest than a Jimmy’s Pie!
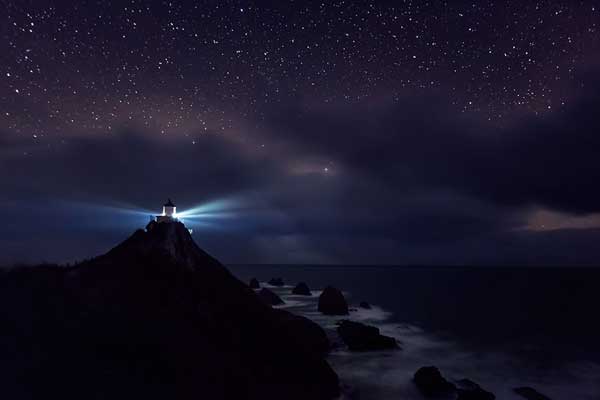
The above image is a single frame from the camera, no “photoshop tricks” or playing, and here’s the funny thing – with the right tools, it was also really easy to capture. So, let’s get started:
You’re going to need some specific camera equipment to do it justice. In order to capture a sharp, (relatively) noise-free, clear and vibrant image you do need some things in your kit bag:
· Lens with a *minimum* f/2.8 aperture, preferably lower
· Lens of 16mm or wider (35mm equivalent)
· Camera body with a full frame sensor if possible
· The capability to shoot at a minimum of ISO1600 at night with low noise
· The ability to manually focus on infinity
· Manual mode, with exposures of 25-30 seconds
· A RED headlamp, dimmable(!)
· A source of soft light in different colours if you want to “light-paint”
To read the rest of this blog please click here.
